
Get on Board the Charcuterie Trend!

If you’ve been scrolling through Pinterest looking for a show-stopping dish to bring to Thanksgiving (or any get-together, really), you can stop now. We got you! Charcuterie boards have been popular for a while, and you may have even created some for previous gatherings, but there’s an art to building one that is both tasty and pretty.
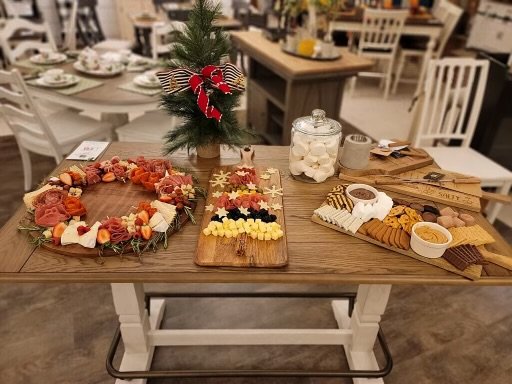
Earlier this month, we held a reservation-only after-hours shopping and cocktails event here at Union Furniture & Flooring to share our tips & tricks on how to curate the most beautiful charcuterie boards, and it filled up so quickly that we kept a waiting list. Since we didn’t have room for everyone who wanted to attend, we decided to share the info and photos with you here.
We plan to host another charcuterie event, and if you would like to be one of the first to know about it, sign up for the Union Furniture & Flooring email list at https://www.unionfurnituremo.com/email-savings.html or follow us on FB or Insta where we post events. Until then, these tips will get you off to a great start:

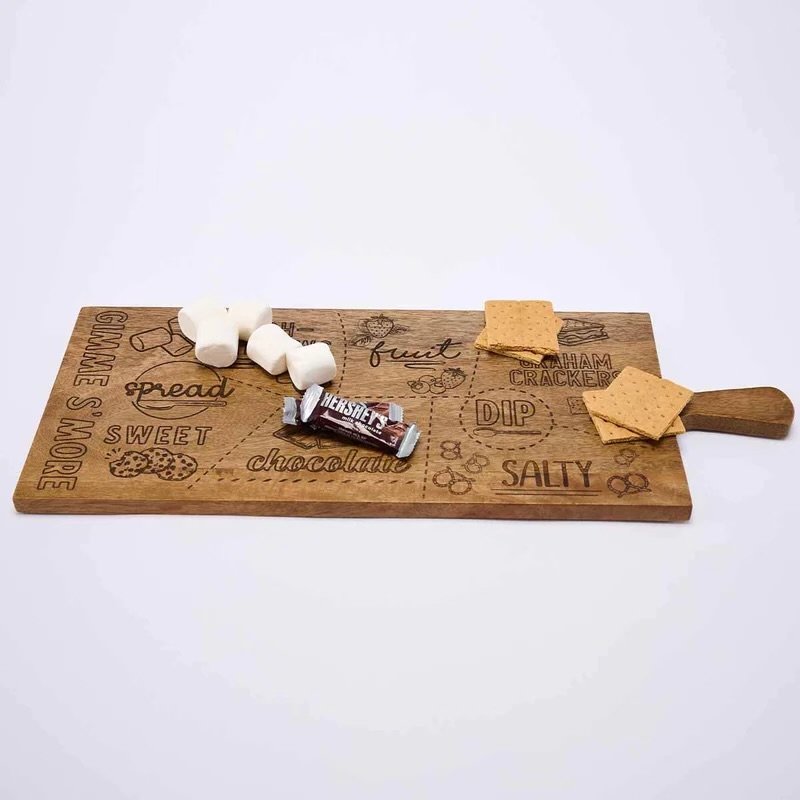
Tip #1: Start with a board from Mudpie.

All of the boards shown here (and used at our event) are from Mudpie, and we have them for sale in the store. We love that there are a variety of shapes and sizes — and even some with engraved descriptions of where to place each item (like a cheat sheet). Our tree charcuterie board is one of those. We just flipped it over to show the plain side on top.
For the holidays, creating a wreath is a fun idea, so a round board is the natural choice. Add sprigs of herbs to represent the greenery.
Tip #2: Have a theme.
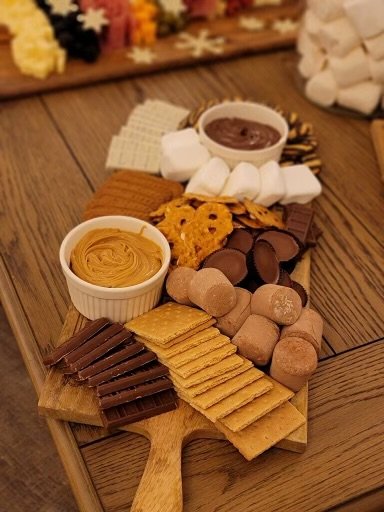
Decide what you want to serve. Will your board be savory with meats and cheeses, sweet with a sampling of desserts (one of the Mudpie boards has a s’mores layout!), or maybe a little of both.
One of the easiest themes for a charcuterie board is bread and butter — two staples of every holiday dinner. Rather than just setting the butter out on a plate and the bread in a basket, serving them a board is way more fun. Add a shallow dish with dipping oil to bring another element, and if you want to add interest, smear the butter across the board.
Laurie Coombs, our marketing director who hosted the event, added a twist by letting the butter soften, putting it into an icing bag with an icing tip and piping it into rosettes on wax paper. Then she put the butter rosettes into the fridge to harden a bit before drizzling them with honey.
Tip #3: Place bigger items on the board first.
“I feel like most people are overwhelmed by charcuterie boards, but you just need to start adding things large to small,” Laurie said. “Also, I feel like charcuterie boards are beautiful chaos, so just keep adding groups of items to fill everything in. And it’s OK if you place something, but move it later as you start adding more things.”

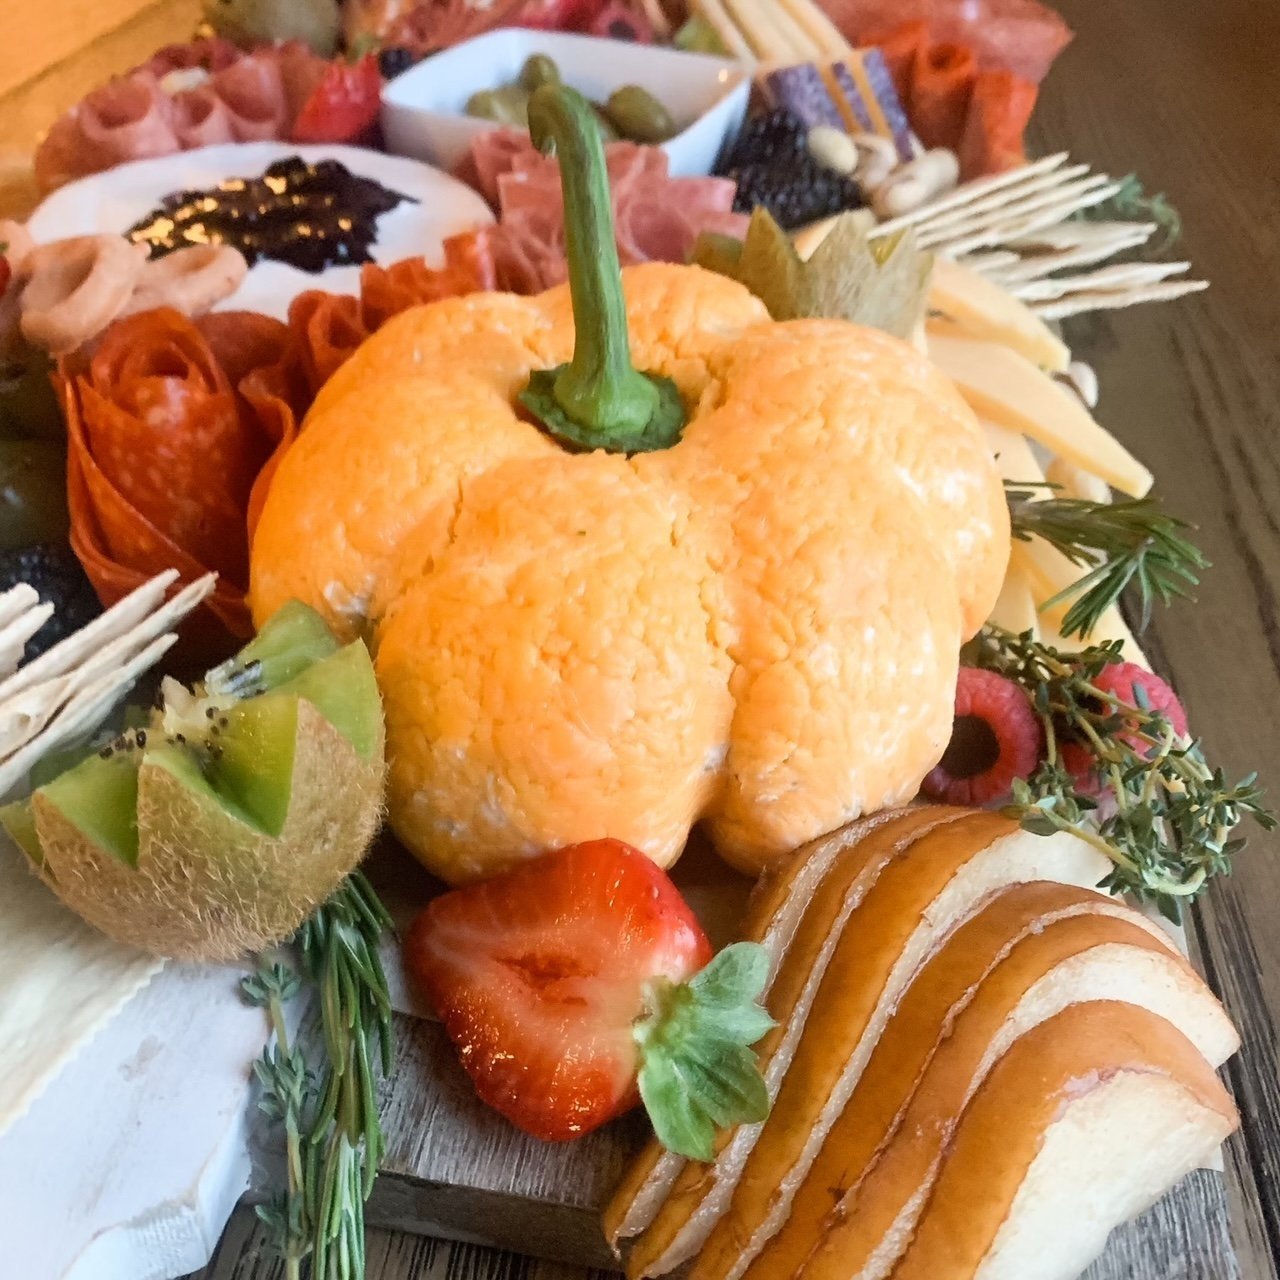
Laurie suggests placing 3 larger items on a board as a start. For the fall board she created for the event, that included a pumpkin-shaped cheese ball, brie cheese, and a white dish. Next, she added bigger pieces of fruit (grapes and pomegranate) and then groups of food, like cheese. She used three different cheeses — one cubed and two sliced.
Tip #4: Be mindful of food color.
Putting space between foods of the same color will add visual movement to your board, but if you want a color block look, then group foods of the same color together.
Tip #5: Add meat last.
This is particularly helpful if you are using sliced meat that you have folded into a shape, since the cheese and other items that you’ve already placed on the board can help hold the folded meat pieces in place.
Tip #6: User crackers to fill in any big, open spaces.
Likewise, you can follow up with filler items. Laurie said her go-tos are kiwis, berries, nuts and fresh herbs.
Tip #7: Add interest with fancy cuts and folds.
At the event, Laurie demonstrated folding techniques for sliced meat and how to make salami roses, how to style triangle-shaped cheese, how to fancy cut a kiwi and how to make a butter rose. And if you want to elevate the look of a block of cheese, Laurie said a small cookie cutter can do the trick.
“I used a maple leaf cookie cutter to cut through the top ½-inch of the brie. Then I scooped out some of the cheese and filled the leaf cutout with jam.”
She also inserted an upside-down chocolate chip into each of the raspberries. That’s a yummy surprise, for sure!
One of the most popular items from our event was the pumpkin-shaped cheese ball featured on the Fall board, so we’ve included the recipe below.
Laurie's Pumpkin Cheese Ball
Ingredients:
8 oz cream cheese, softened
7.5 oz container of chive & onion cream cheese spread
1 tablespoon light beer
1 tablespoon Ranch Dip Mix (about 1/2 the package)
¼ teaspoon garlic powder
salt and pepper to taste
8 oz sharp cheddar cheese block, finely grated (I’ve found that freshly grated cheese works better than packaged shredded cheese.)
1 stem from a bell pepper
Instructions:
1. Beat together the softened cream cheese, chive & onion spread, salt, pepper, garlic powder, ranch dip powder, beer, and 1 cup of the shredded sharp cheddar cheese.
2. With a spatula scrape the sides of the bowl and form the mixture into a ball.
3. On the counter, spread a double layer of cling wrap, long enough to wrap around the cheese ball (but don’t put the ball on it yet)
4. Sprinkle ⅓ cup of cheese onto the cling wrap where the bottom of the cheese ball will sit
5. Place the cheese ball mixture on top of the cheese, then pat the remaining shredded cheese onto the top and sides of the cheese ball to cover
6. Wrap up the cheese ball in the cling wrap and press to form a ball shape
7. Use 3 or 4 thick rubber bands on the outside of the cling wrap to form the grooves in the cheese ball that make your pumpkin
8. Chill the cheese ball in the fridge for at least 2 hours, then remove the rubber bands
9. Top your cheese ball with a bell pepper stem to look like a pumpkin and serve with crackers of choice